Link copied to clipboard

- Close


Kindness is Universal
In the spirit of uniting humanity over kindness, here are ways to say “be kind” in several languages.
They say kindness is a universal language. No matter where you are in the world, an act of compassion can be recognized by all, regardless of language or cultural barriers.
From teaching kindness to young children to growing to be a better person as an adult, it’s important to embrace this concept and remember the global significance of simply being kind.
In the spirit of uniting humanity over kindness, here are some ways to say “be kind” in multiple languages:
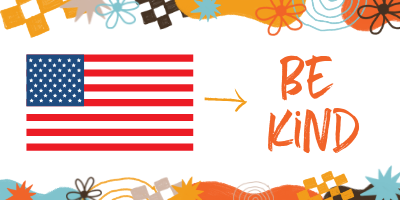
English: be kind

German: sei freundlich
French: etre gentil
Mongolian: эелдэг бай
Indonesian: berbaik
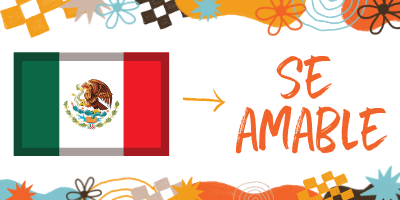
Spanish: se amable
Russian: будь добрым
Irish: Bí cineálta
Arabic: كن طيبا

Portuguese: seja gentil
Chinese: 善待
Hungarian: legyen kedves
Korean: 친절하게 대해

Japanese: 親切にする
Italian: Sii gentile
Greek: να είσαι ευγενικός
Norwegian: vær snill

Ukranian: бути добрим
Czech: být milý
Croatian: budite ljubazni
Other Kindness Articles You May Also Like:
- Kindness During the Coronavirus
- A Complete Guide to Kindness Rocks
- Kindness 101: What Is It and How Do You Teach It?
With Mother’s Day around the corner, it’s time to think of ways to show your mom – or another woman who has positively impacted your life – your love and appreciation. Easier said than done, right? Mother’s Day is one of those holidays that tends to add stress. Understandably so, because we all want to show Mom how important she is to the family and tell her thank you for all she does.
It’s overwhelming to think of special things to do for someone who’s done so much. We’re here to help! Here are seven easy ways to show Mom a little love and kindness this Mother’s Day.
1. Say Thank You
A simple word of gratitude may seem obvious, but it’s surprising how often this little phrase is forgotten or overlooked. Take the time to say thank you to your mom. Not only will this brighten her day and maybe even surprise her, but it’ll make you feel good too! Sometimes these simple words can mean the most, especially if you haven’t said them in a while.
2. Personalize a Card
It’s easy to buy a cute card and sign your name and even easier to send a card via email, but we encourage you to take card-giving up a notch. Considering making your own! You can go as simple as folding a piece of paper in half and writing a sweet note, or you can go all out and turn it into a personalized art project. If creativity isn’t your greatest strength, spend some time picking out a store-bought card that reminds you of her and include a meaningful, handwritten note. Either way, make Mom feel like the card is just for her. Whether you live near or far, consider mailing the card. Receiving a surprise in the mail is a rare thing these days!
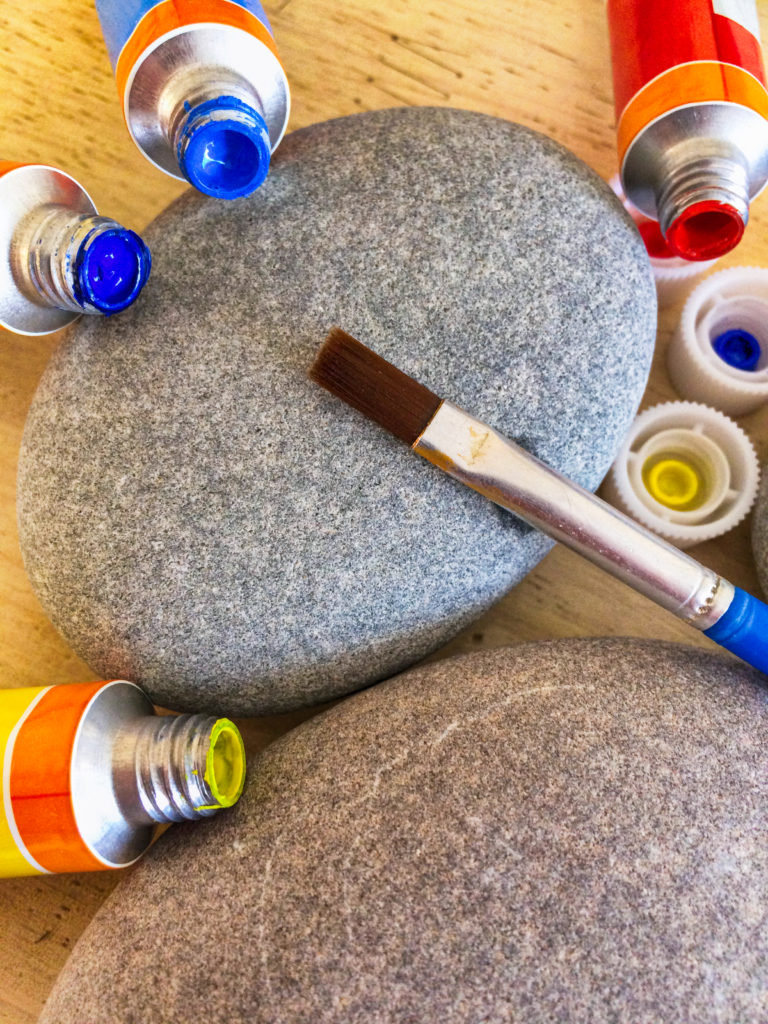
3. Create a Rock Garden for Mom
This creative gift is easy for kids of all ages. A personalized rock garden will make Mom feel special and will add even more color to her yard. Here are five steps:
- Buy a Rock Painting Kit, so you’ll have all the needed supplies.
- Find smooth, flat rocks, or make your own. The Kindness Rocks Project has a free guide that gives step by step instructions for making rocks out of concrete.
- Write a list of words that describe your mom.
- Paint your rocks and add your words that describe mom. Don’t forget to have fun!
- On Mother’s Day, place the rocks in a place just for mom!
4. Write Down Reasons You Love Her
What are your favorite memories of Mom? What life lessons has she taught you? How does she make you laugh? Think about the advice she gave that made a difference in your life. What funny phrases does she often say? Writing down all the reasons you love Mom is another excellent and simple way to show kindness this Mother’s Day. So, sit down and create a list of all your favorite things about her. You can even get creative and frame it for her as a gift! Kind words are priceless.
5. Spend the Day with Her
Time is one of the greatest gifts of all, so be intentional and spend Mother’s Day with your mama bear. Most moms just want to spend time with their children, recalling memories, and making new ones. We know life can get hectic, and so does she, so going the extra mile and spending the day with your mom is a meaningful way to show you care.
6. Cook for Her
Chances are your mom has made you many meals over the years. Return the favor and cook her favorite meal this Mother’s Day! It doesn’t matter if it is breakfast in bed, a picnic lunch, or a candlelit dinner, being her personal chef will let her relax and enjoy the day. If you’re not the best cook, you can still help out by doing chores around the house, so she has no (well…fewer) worries.
7. Gift Her a Clean House and a Peaceful Day
Spend the day cleaning the house for Mom. Allow her to sit outside to read and relax – just put her feet up for a change. Make sure to stop any arguing that may start between family members. Mom needs peace! Purchase some flowers to add some color and fragrance to the home.
All of these ideas are simple and cost-effective ways to gift mom love this Mother’s Day. Kindness costs nothing but means the world to those who receive it. We hope these ideas inspire your next act of kindness for Mother’s Day! Don’t forget to Inspire Kindness!t
A kindness rock, sometimes called a kindness stone, is simply a rock that someone has taken and decorated with an inspirational message.
Have you ever stumbled upon a colorful rock that has been painted in bright colors or has an uplifting message written on it? You may have just found a kindness rock! Rock painting is a trend that has picked up popularity in recent years. Whether you’re an artist who is looking for a new way to be creative or someone who wants to share a positive message with others, painting rocks might be for you.
What are Kindness Rocks?
You might be asking yourself, what the heck is a kindness rock anyway? A kindness rock, sometimes called a kindness stone, is simply a rock that someone has taken and decorated with an inspirational message. They can be any size or shape, as big or small as you like! The point of these cute stones is to sprinkle positivity around your community. Once you paint a rock, the idea is to leave it somewhere for another person to find and enjoy. As we all know, sometimes a simple message of kindness can spark joy and brighten someone’s entire day.
Who Started the Painted Rocks Trend?
Looking through social media, it seems like there are so many people who are painting rocks now! But where did this all start? The woman behind this movement is Megan Murphy of Massachusetts. Megan used to take walks around her local beach, and she loved looking down at beautifully shaped stones, shells, and sea glass.
One day on one of her walks, she had a thought: why not create something intentional for someone else to find that could also brighten their day? With this thought, The Kindness Rocks Project began! Megan started painting rocks herself and leaving them at her local beach in Cape Cod. It made her happy to think that she could spread happiness in such a simple way. That simple idea has become a global movement.
Now that you understand how and why this trend has become so popular, you may want to start painting yourself. It is an excellent activity for rainy day fun, team building, community engagement, and more.
Before you get to painting, here are a few common questions that you may have.
What Materials Do You Need To Paint Rocks?
Here’s the list of things you’ll need:
- Smooth rocks
- Acrylic paint
- Sponge brushes
- Acrylic paint pens
- Sealer
Inspire Kindness and The Kindness Rocks have made gathering rocking painting materials easy! You can also check out InspireKindness.com for kit suggestions.
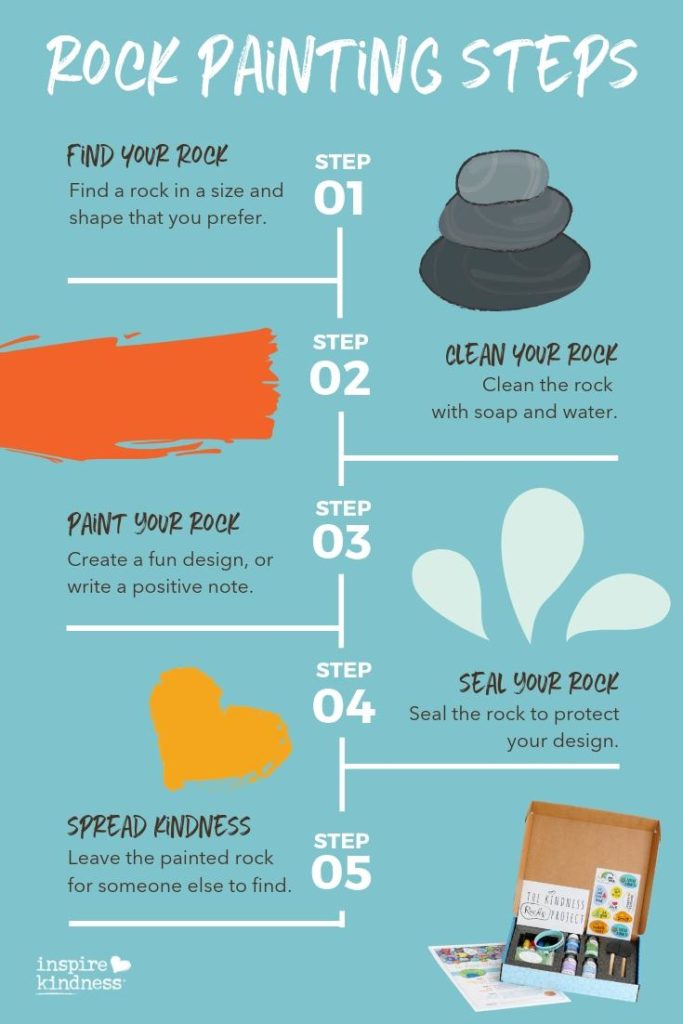
How Do You Make a Kindness Rock?
Learn how to paint rocks; it’s easy!
1. Find your desired rock. Clean it with soap and water.
2. Once the rock is dry, paint the top with a base coat of paint—pick any color you like.
3. When the base coat is dry, add a fun design, or write a positive note like, “Be the Change” on each one.
4. Allow the design to dry completely, and then seal the rock to protect your design.
5. Spread kindness by leaving the rock in a place for someone else to find.
If you make a mistake, paint over the whole rock and begin again! That’s the beauty of working on such a small canvas. Remember, there is no right or wrong way to paint a rock. The point is to spread kindness and to have fun while doing it!
Quick Tip: If you don’t have paint or don’t have the time to do a base coat, feel free to write a positive message directly on the rock itself!
Where Do You Get The Rocks?
Well, you can get them just about anywhere! A hardware or craft store in your area most likely sells rocks of many shapes and sizes. Some local landscaping businesses may also offer them for sale, and this is especially good if you are looking for larger sizes. Avoid buying stones that have a waxy film as they will be harder to decorate.
Or, just go outside and find some. From picking up pebbles on the beach to stones in your local park, any rock can make an excellent kindness rock. Choose the type of rock that you think will fit your designs best and don’t take all the rocks out of one area. We want to be kind to our environment, too.
What Kinds of Paint Do You Use for Kindness Rocks?
We recommend using acrylic paint for both the base coat and your design. For more intricate, hand-painted designs, we suggest that you use paint pens to draw on top of your base coat. With paint pens, you can be a bit more accurate when you are writing on or adding details.
Quick Tip: Make sure the paint you get is multi-surface and works outdoors.
How Do You Seal the Rocks?
Your creations need to be sealed to preserve the paint and the beautiful designs you worked so hard on. Mod Podge or a spray-on sealer will work just fine—just make sure it’s a waterproof sealer. Our favorite sealant is Deco Art Multi-Purpose Seal. You can find this and other types of sealers at your local craft store, and also in our Inspire Kindness rock painting kit on InspireKindness.com.
Where Do You Hide a Painted Rock?
Once you’ve painted, it’s time to hide the rocks for others to find! Now, use the term ‘hide’ loosely; you want someone to actually find the rock. Think of somewhere that gets a lot of foot traffic where someone may notice it. A local park, a bench in town, or outside of a community center are all excellent options.
You can also be more intentional about where you place the rock if you want to be sure that someone will find it. Leave one in the common area of your office building, place one by the bathroom sink at school, or on a teacher’s desk. They don’t even have to be hidden at all. You can keep them on your desk or dresser for inspiration. Give them as a gift, or hand a rock off to someone that you think could use words of encouragement.
Be considerate when looking for places to put the rocks. Don’t leave them at a private residence or business where you don’t have permission. National parks are also a no-go as most have a “leave no trace” policy. The purpose of creation is to be kind, so let’s be respectful of our environment.
What Do You Do When You Find a Kindness Rock?
You’ve found a kindness rock. Now what? Do you take it? First, read it! Take the message to heart, and know that you matter and your happiness matters. Someone else went out of their way to paint that rock for you to find. How cool that you’re the one who found it!
Then, if you want to, share the love. The Kindness Rocks Project has gained popularity on social media, so share your photos for others to see. Check to see if there may be a local Rock Group in your area, and consider joining. The group can get together to paint and place them around town. Write the name of your group on the back of your rock so people can search for it when they find the rock.
Lastly, pay it forward! Once you’ve read and enjoyed the message, you can either hide the rock somewhere new for another person to find or if it meant a lot to you, keep it. All we ask is that if you keep the rock for yourself, that you paint another rock for someone else to find. Think of what the message meant to you. Make sure you help somebody else get that unique feeling too.
What is a Kindness Rock Garden?
People have found that placing a group of kindness rocks together to form a garden can make a wonderful impact on a community. Pick a spot that has plenty of people coming and going. Think about parks, libraries, schools, and public grassy areas near stores and restaurants. Then, leave a group of rocks and a sign that explains the rock garden. The sign should tell people that they can take a rock, leave a rock, or simply read the kind messages, smile, and continue on with their day. These positive phrases are sure to make so many peoples’ days. Check out examples of rock gardens.
Rock Painting Sayings and Quotes List
Not sure what to write on your kindness rock? Here are some ideas to get you started!
You matter
Have a nice day
Trust the process
Kindness rocks
Be kind
You are loved
Not all who wander are lost
Chase your dreams
Be the change
The world needs you
Here comes the sun
Kindness wins
You are not alone
Inspire Kindness
Be Happy
Don’t give up
Have hope
Intention over attention
Inspire others
Today is a gift
You’re beautiful
You can do it
Spring into action
Be a rainbow in someone else’s day
Love Yourself
Kindness matters
Easy Rock Painting Ideas
We recommend starting with more simple designs and try to work up to more advanced illustrations if you would like, but you can design the rock however you want! Designs do not have to be intricate. Paint simple things like smiley faces, hearts, flowers, and polka dots. Or just focus on your message and leave a little inspiration on the rock.
Need design inspiration? Here’s some help:
The Kindness Rocks Project Instagram
Inspire Kindness Rock Painting Pinterest Board
Now that you know everything you need to know about kindness rocks, you’re ready to get started! You have the power to make someone’s day with the kind messages you write. Start the trend of rock-painting in your community, and watch the ripple effect you create. Thank you for helping us inspire kindness.
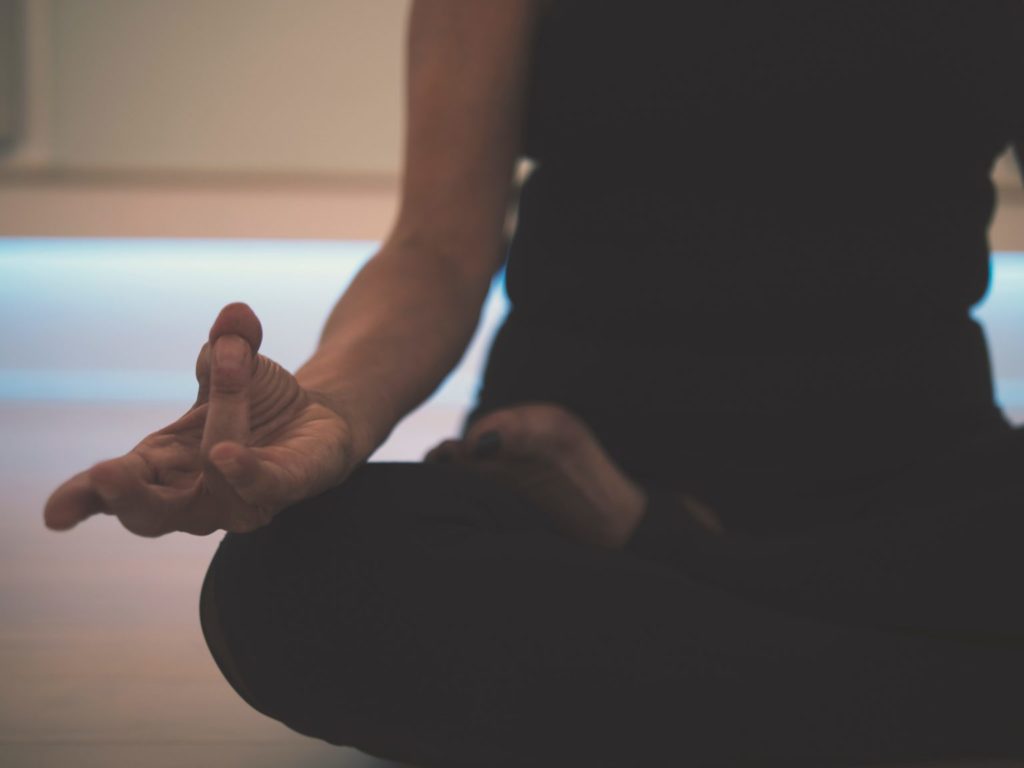
5 Lessons I Learned About Life From Yoga
I started studying yoga about 20 years ago when I was competing in triathlons because I had no flexibility in my body. Basically, when I tried to reach to my toes, I would get to about my knees with my hands. So if you can relate to that, just to let you know there’s hope because I’ve been able to open my body over the years, and have more flexibility.
I continued to practice yoga, and then about 10 years ago I was in two consecutive accidents where I had to rebuild my whole entire body, and yoga was a big part of how I healed. I was able to go deeper into the philosophy and the different layers of Yoga. So let me share the five lessons that I’ve taken away.
#1 Breathe with your whole being.
Yoga means to yoke. It’s yoking the body, mind and spirit, and going from duality to oneness. So connecting on all levels, and the basis of that is our breath, and our Pranayama, creating that. Most people don’t breathe that well. What we need to do is drop our breath into our belly, and then also do this thing that I call a 360-degree breath.
When we’re breathing with our whole body, this will help us be more present and in the moments. If you slow down and think about it, being present is the only reality that we really have. It’s about being present in the now. So definitely breathing with your whole being is a big lesson to learn.
#2. Master the basics and master transitions.
So I have studied with a lot of teachers and masters, and it’s very consistent across the board. Whenever there’s an issue, whenever we’re confused about things, go back to the basics and master the basics. We’ve got to have a solid foundation, so that we can build the house. We are like a tree the deeper the roots, the more we can express. It’s really important in the beginning not to try to do everything at once, but to master the basics.
In asanas, it’s doing a vinyasa of five poses and doing that a hundred times. It’s doing this repetition over and over until you see what’s going on, so that you can start building off that. And then once you learn some sequences, it’s really about transitions and having awareness of transitions.
So for instance, in yoga when you’re stepping down on the mat, are you slapping the mat or you gracefully putting your foot down? This is kind of a metaphor for life. How are you going in and out of events and experiences in your life? Are you stressed? How much awareness do you have of coming in and coming out and creating that flow that we’re looking for.
#3. Repetition, practice, discovery and layers.
It’s all about repetition. It’s practicing, practicing, practicing the journey over and over. We have this external idea that we’re going to make things work. But it’s really all about the practice. Every single day I’m practicing—I’m meeting myself where I’m at, and then also discovering these deeper layers. It’s amazing when we can have this open mind, this curiosity, how the layers come in and we discover these deeper connections that we’re really looking for.
#4. One foot in front of the other.
Just focus on putting one foot in front of the other and training the mind. This is about awareness and really being able to focus on being present. It’s a focus on taking one step first before the next step, instead of trying to get everything right all at once, and trusting the process.
We tend to experience what I call the shiny blinking thing that constantly distracts us. We can train the mind to just look at one step at a time, putting one foot in front of the other, in order to start having control and really being able to focus, so that we’re not constantly distracted from our path by texts and emails and whatever new great thing is happening. It’s really about coming back to being able to focus and just do one thing at a time.
#5. Don’t try to change everything at once.
Any change in the body is stressful. We have to slow down and just take one step at a time. It’s amazing how much you can learn in three to six months when you do this. You’ll discover a consciousness and awareness that allows you to complete the task confidently and competently.
Did you know that kale is one of the most nutritious foods on the planet? Paired with Thai turkey sliders, nutritionist Jill Castle shows you how to have a true home run for lunch or dinner!
Servings: 10-12 turkey sliders
What you need:
1 pound ground turkey
¼ cup Panko bread crumbs
2 Tablespoons soy sauce
1 Tablespoon ginger paste
2 Tablespoons sesame oil
2 scallions (green onions), thinly sliced
Bakery-style dinner rolls
Mix ground turkey, Panko, soy sauce, ginger paste, sesame oil, and scallions together in a large mixing bowl. Roll mixture into 10-12 small balls and press into a 2-inch circle. Bake on a cookie sheet in a 400° F oven for 15 minutes, or grill until done. Serve on a dinner roll.
KALE CHIPS
1 bunch kale, leaves rinsed and patted dry
1 tablespoon olive oil
1 teaspoon Kosher salt
Preheat oven to 350F. Line a baking sheet with parchment paper. Use scissors to trim stems off kale. Tear kale, rinse and dry in salad spinner. Drizzle kale with olive oil and sprinkle salt over the kale, as evenly as possible. Bake until edges are brown (but not burnt!), about 10-15 minutes.
Nutritionist Jill Castle shows you how to make this hearty, healthy calzone.
Servings: 1 calzone, 2 servings
What you need:
1 pre-made pizza dough
1 package of sliced turkey pepperoni
½ cup of skim milk ricotta cheese
1 ½ cups of shredded mozzarella cheese
2 teaspoon dried basil
Heat the oven to 375 F. Separate the dough into two parts, and roll out each one into a thin circle, about the size of a dinner plate. Combine the ricotta cheese, mozzarella cheese and the basil in a separate bowl. Layer ¼ of the pepperoni on one half of the dough round. Add ½ of the cheese mixture on top and spread; layer ¼ of the pepperoni on top. Fold over into a half circle and pinch edges together, securing further with the tines of a fork. Do the same with the remaining dough round, cheese and pepperoni. Place both calzones on a greased cookie sheet and bake for about 30 minutes.
Nutritionist Jill Castle shows teens how to give their metabolisms a protein and vitamin boost when they’re needing a quick snack or meal!
Servings: 2 potatoes
What you need:
2 large Idaho potatoes
1 package broccoli–steam in the bag
Cheddar Cheese Sauce:
½ tablespoon butter
½ tablespoon flour
½ cup low fat milk
½ cup cheddar cheese (+ more as desired)
Pre-cooked turkey bacon, chopped into “bits”
Wash and dry potatoes; pierce with a fork several times. Cook potatoes in microwave oven on the “potato” setting, or for 6-8 minutes. Remove and set on a plate. Cook broccoli according to package directions. Chop the bacon or use kitchen scissors to cut into small bits. Meanwhile, make the cheddar sauce by melting the butter in a small saucepan. Add the flour, mixing with butter for about 2 minutes or until flour is browned. Slowly add milk, whisking as you go. Continue to whisk while the sauce thickens. When it is thick, add the cheese and continue to stir until melted through. Cut the potatoes down the middle and open them wide. Top with cooked broccoli, then cheese sauce, and bacon bits.
Nutritionist Jill Castle shows you how to make a delicious meal for busy school nights. Prep the steak in the morning and you have a healthy dinner in less than 10 minutes!
Servings: 4-6
What you need:
1-2 pounds flank steak
⅓ cup balsamic vinegar
⅓ cup olive oil
5 cloves garlic, minced
⅓ cup grainy mustard
salt and pepper
In a bowl, combine the minced garlic, vinegar, oil and mustard and whisk together. Score the flank steak. Place the steak in a large ziploc bag, and pour the marinade in. Zip it closed, eliminating the air. Let marinate for at least 4 hours. Pull out of the refrigerator 30 minutes before grilling. Sprinkle with salt and pepper on both sides. Grill outside, or on top of the stove on a large grill pan; 5 minutes per side for medium-rare. Let rest for 5 minutes before carving (against the grain).
Roasted Vegetables – (makes 4 servings)
1 small eggplant, peeled and large dice
1 large onion, large dice
1 yellow squash, large dice
1 zucchini, large dice
2 tablespoons olive oil
Kosher salt and pepper
Pre-heat the oven to 400 F. Wash and prepare the vegetables. In a large bowl, toss the veggies in olive oil and sprinkle with salt. Spread on a large baking sheet. Roast for 10 minutes and turn them over/stir them. Roast for another 5-10 minutes until browned.
Welcome to Kate’s Kitchen with Teens.
Ditch the boxed mac & cheese, and see how tasty homemade macaroni & cheese is!
Servings: 4-6
What you need:
1 pound elbow macaroni
2 tablespoons butter
2 tablespoons flour
2 cups of low fat milk
2 cups sharp cheddar cheese, shredded
4-6 slices deli American cheese
Kosher salt
pepper
Cook macaroni according to package directions. Drain and set aside in a large mixing bowl. Melt butter in a large pot over medium heat. Add flour and whisking, cook until browned, about 1 minute. Slowly whisk in the milk, making sure to continuously stir. Keep stirring until “roux” (a white sauce base that can be flavored, usually with cheese) thickens, about 10-15 minutes. Turn heat to low. Add the cheeses, stirring until completely melted. Salt and pepper to taste. Pour cheese sauce over the macaroni and mix well. Serve like this or transfer to a baking dish and bake at 350F for about 20 minutes or until browned on top.